Friday 8 November 2013

Delicious Green Smoothie


I recently decided to start making my own smoothies for an energy/health boost after the gym or work or to kickstart my day. Juicing has so many health benefits and all individual ingredients have so many health properties themselves so add them all together and you end up with a magic potion for health! Well thats how I'm trying to sell it, but i really do feel much better for drinking them. Green smoothies tend to be best as they are alkalizing to the body and very nutrient rich, which in turn helps your body to work at its best and maintian health. I find them very filling so that equal less snacking, which can only be a good thing!


I am going to start posting different recipes for smoothies to help inspire. One thing though, NEVER be put off by the colour of a smoothie. Looks are most definitely deceiving! I am led to believe the worse it looks, the better it tend s to be for you. Luckily mine tastes fantastic and looks good too ;) Its the only way I'll ever be able to incorporate spinach or kale or any green leaves into my diet as I really cant stand them.

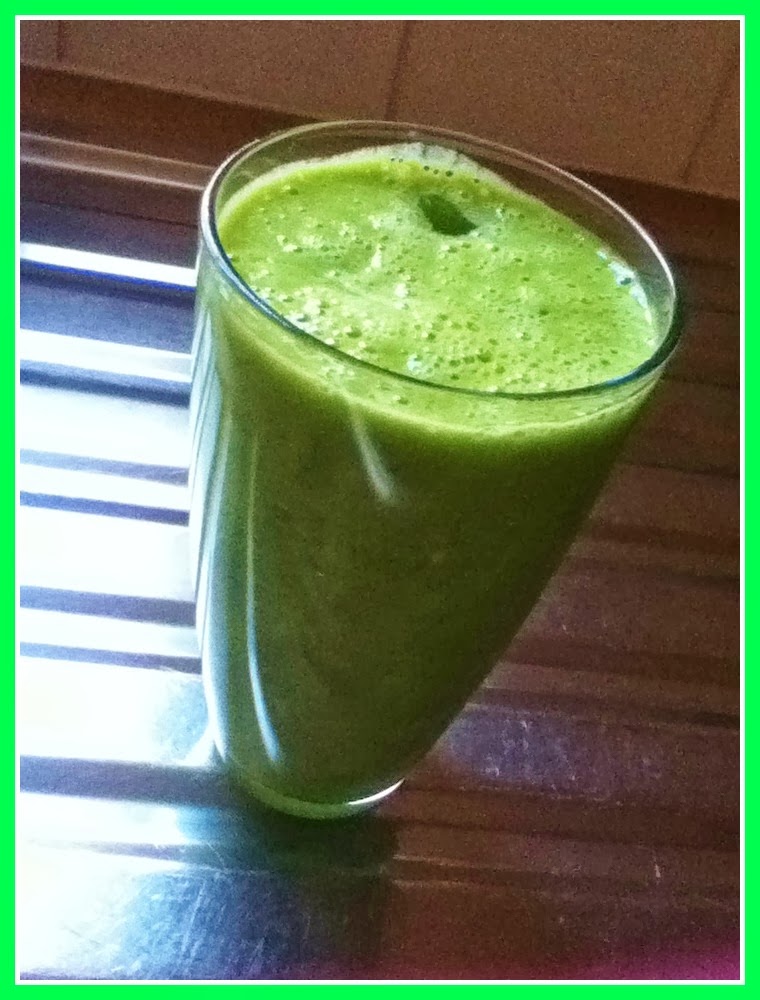
This Smoothie is really healing and cleansing and best of all you dont taste any of the greens :)

Ingredients

Generous handfull of spinach   * The more greens the better, you can always even out the taste with fruit!*
Generous handfull of kale 
7 or 8 small chunks pineapple
2 clemintines (peeled)
Fresh ginger (finely chopped) * I tend to add a small amount as it can be very overpowering*
Juice of a fresh lemon
Juice of a fresh Lime
Coconut water or spring water ( To thin down Mixture)
A Few ice cubes 

NOW BLEND!

Make sure It is completely smooth and there are no bits. I tend to put mine in the fridge for a wee while just to cool down further as i like it chilled. It is much more pleasant to drink!

Helen xX


Chewie Chocolate Chunk Oatie Cookies (Egg Free Recipe)

A delicious sugary sweet oatie cookie which is crisp on the outside and soft and chewie in the middle. This recipe requires no eggs, which is handy for those who may be intolerant or who just dont happen to have any in. I made a few cinnamon spiced ones just as a wee experiment and they turned out fab! Close up pictures to follow.


What You Will Need:

125g Butter
120g Light Brown Sugar
100g Caster Sugar
210g Self Raising Flour
70g Oats
2 Tbsp Golden Syrup
Splash Vanilla Extract
Variations - 1 Tsp Cinnamon Or Chocolate Chunks

Method:

Preheat oven to 180 degrees

Mix both the sugars and butter together until smooth and creamy. Add a splash of vanilla extract.

Add 2 tbsp of the golden syrup and mix.

Variation ingredient added here - either the cinnamon or chocolate chunks. Mix.

Add the oats

Sieve in flour and mix with a wooden spoon until it is blended

Roll into small balls and place onto a greased baking tray

Ensure there is enough space between the balls as they will flatten and expand

Bake for around 13 minutes

Leave to cool on wire rack

* Cookies will still be very soft when ready. They will harden up more as they cool, but remember they are meant o have a moist chewie texture*

Cookies with chocolate chunks
Cinnamon Variation
 Happy Baking!
Helen xX

Malteser Truffles & Coconut Truffle Recipe

A no fuss recipe that anyone can throw together in no time at all :)


Malteser Truffles

200g Cream Cheese
350g Icing Sugar
500g Milk or Plain Chocolate (preference)
135g Bag Maltesers 
Splash Vanilla Extract

Cream together the cream cheese and the icing sugar until smooth and add some vanilla extract

Crunch up the matlesers until they are in pieces 

Melt the chocolate in a pan over a low heat 

When the chocolate is melted add the smashed maltesers and mix together

Blend the melted chocolate mix and the cream cheese mix together. stir well.

Put in the fridge for around half an hour for the mixture to stiffen up

Once the mixture is a little more pliable, roll into balls and dip into chocolate strands or chocolate flakes.

Put in the fridge for around an hour to set further more


Coconut Truffles (Using same measurements as above)


Cream together the cream cheese and the icing sugar until smooth and add the vanilla extract

Melt the chocolate in a pan over a low heat

Combine the two mixtures and stir well

Put in the fridge for around half an hour for the mixture to stiffen up

Roll into balls and dip in some desicated coconut and put in the fridge to set


*Truffles are est kept in the fridge for freshness*


The best thing about this recipe is that there are lots of variations you can try out. I think next time I am going to try out a rocky road version and a white chocolate, cherry and biscuit one :D


Happy Baking
Helen xX


Friday 29 March 2013

Easter Treat: Mini Egg & Chocolate Dipped Cookies


Super sugary, sweet soft chewie cookie with crushed mini eggs half dipped in chocolate. The perfect easter treat.. Lets go!


What You Will Need :

40g Caster Sugar
40g Dark Brown Sugar
75g Butter or Margarine
130g Self Raising Flour
2tbsp Syrup
1 Bag Mini Eggs
Splash Vanilla Essence
Melted Chocolate
Sprinkles

Preheat oven to 190 degrees.

First of all, mix together the caster sugar, brown sugar and butter until smooth and creamy.

Add syrup and vanilla essence and stir in.

Put the mini eggs in a bag and crush them with a wooden spoon (some elbow grease is required here, they are pretty hard)

Add them to mix

Sieve 130g of self raising flour and add to the mix.

Stir in flour with wooden spoon.

Next  roll balls of the dough and place onto greased baking tray, no need to flatten as they will do so on there own.

Leave plenty of space between each cookie as they will expand.

Cookies should be left in the oven for between 8-12 mins I usually check the cookies at around 10 minutes and usually they are okay. The cookies will feel soft at first but they will firm up whilst they cool.

Next melt some chocolate in the microwave, I used Cadbury Dairy milk and dip the cookie in, You can use a knife to spread and then pour on some sprinkles before it sets :)


Hope everyone has a nice Easter. I have a tonne of eggs and malteaster bunnies to keep me occupied :D

Happy Baking!
Helen xX

Wednesday 13 March 2013

Happy Birthday.... To My Blog!


It has officially been 1 year since I started my little blog and I didn't want to not let it go by without a wee mention. I just want to say a big thank you to everyone that has stopped by and an even bigger thank you for anyone that has taken the time to follow or leave a comment. I appreciate each and every one <3 I will continue to post in the future. Right now I will have to put my college work first as I missed over a month of college and need to catch up and prepare for  2 exams etc but I will be back soon enough! I have some recipes I want to try out and a whole lot of beauty related nonsense to share :). So much has changed since last year, unbelievably..but gotta keep going!

Images (Tumblr)


Helen xX

Monday 25 February 2013

What I've Bought: Beauty & Make Up

Oh how I love spending...


I really shouldn't go shopping when I'm upset haha I tend to go a bit mad and buy a tonne of things to cheer me up but hey we are all guilty of it at some point :)

What I bought -

Bendy Rollers
These can create a tight curl or a lovely loose wave depending on how much hair you wrap around each roller and all without heat. Win!

Cocoa Butter Formula Eye Cream
I have never tried any of their facial skin care so was intrigued when I saw this. I know I dont need anti wrinkle cream yet, but prevention is better than cure. It glides on easily and has a smoothing finish.

The Body Shop Tea Tree Foam Face Wash
 Bought it as I have the toner and I love it. It will be good to use the two products in conjunction with each other. On first impressions it is very refreshing for the skin.

Soap & Glory Clarity 3 In 1 Daily Detox Vitamin C Facial Wash
This is a re-purchase. Its a gentle scrub with a pleasant fresh scent. As its not harsh I tend to use it everyday as my skin in quite uneven and oily. This doesn't dry out my skin either. Great product!

The Beauty Parlour Body Scrub
Another re-purchase. This is a really grainy, gritty scrub. Fantastic for helping to remove fake tan or prep skin for tanning.

The Body Shop Madagascan Vanilla Flower Fragrance Mist
LOVE. This is a real true vanilla scent that isnt too sickly. Its sweet, but fresh and long lasting.

Revlon Eye Primer + Primer - Shade 003
This is fantastic for brightening up the under eye area. I bought shade 003 as it is very light and I want to be able to use it when I tan. A good addition to my make up collection.

Lush Grease Lightening
A great skin treatment containing witch hazel and tea tree oil. A little goes a very long way. I like to use it all over my face to mattify my skin. This has been something I have always wanted to try as I have seen countless reviews. It is living up to the hype so far :)

LOOK Beauty Blush - Shade - 4 Rosy
I have never tried anything from this range before but fancied buying a new blush. I dont have any in this sort of shade. Its a peachy pink and leaves a fresh glow to the skin. I will definelty purchase more from this line in the future.

Real Techniques Blush Brush
I love the real techniques range of brushes. The stippling blush has totally changed the look and application of my make up. I am yet to try out this brush, but looking forward to doing so.

NYC Big Bold Curl Mascara
I have wanted this ever since I seen a review of it from The Sunday Girl Blog (fantastic blog!)  It has a curved large wand, perfect for gathering product and curling the lashes. I dont find it clumpy and find it really thickens out my lashes (see image above)

Primark Anti- Bacterial Wipes
These are handy to have in your handbag. They also came with a zebra print. They are moist and have a pleasant scent. I love the packaging... Will fit into my tacky love of animal print just perfectly :)
Thanks For Reading

Link me any beauty hauls, love to see what other people are buying

Helen xX

Saturday 2 February 2013

L'oreal Hair Expertise Everstrong Shampoo and Treatment Review


I've grown a bit tired of my Aussie hair care (still love it!) but wanted to try something new. Thats when I came across the L'oreal Hair Expertise Everstrong range. The range has shampoos, conditioners, treatments and heat protectant sprays for different hair types, that work to "reinforce" the hair and contain no sulphates. The Everstrong range is designed for fragile and brittle hair. As a bleach blonde with long hair, I need to keep my hair well nourished so that it doesn't snap and break. Unfortunalty I suffered with some breakage 3 years ago when I first hit the bleach. Since then though I have been incredibly cautious when it comes to my hair. I try and use heat as little as possible and I try and use the best possible products for my hair, so that it doesn't happen again and so far it hasn't :)


This shampoo contains Botanical Oils - Rosemary & Juniper. It smells lovely and it not too overpowering. It has a rich creamy consistency and lathers up well, considering it doesn't contain the usual nasties. I have been using this shampoo for a month now and I have been so far impressed. My hair definitely feels a lot healthier and less dry.Winter can be so harsh on your hair. Especially mine as I tend to wear it down all the time, it gets blown about (general birds nest) I think using it in conjunction with the mask once a week has been more beneficial to my hair than just using the shampoo alone. The "Nourishing Intense Mask" is a lovely thick consistency and feels very luxurious. It smells slightly stronger than the shampoo, but I love it. As it is rich L'oreal recommends than you only use a walnut sized amount, leaving on for 3- 5 minutes,  which is what I have been doing. Overuse of treatment isn't good for your hair either,  it can make it weaker.

What L'oreal says
"Specially designed for fragile and brittle hair, the Everstrong Reinforcing  & Vitality range combines a reinforcing system with no sulphates and conditioning actives. The formulae help intensely revitalise the look of your hair"
Overall, I am impressed with this range. So much so, that I decided to share it on here :)I think I would like to try the heat protectant next, as I am running out of my Aussie one. I will most likely repurchase this again in the future. I like to switch up my hair care as I do like to try new products. If any one has any recommendations of any other hair care brands that are worth the hype, let me know :)

Thanks For Reading!
Helen xX

Sunday 27 January 2013

Lipsy Animal Fluro Quilted Shopper


YAAAY a new handbag to add to my collection! This is my 5th Lipsy bag. I love Lipsy bags as they are most usually very bright with a fun design. This bag is no different. Its very loud with the fluorescent pink and the clash of the animal print, but I love the fact that it stands out. I understand it may not be to everyones taste, but I love the boldness of it and it easily adds colour to a plain outfit and as I have to wear black every day to work this gives a colour injection to my depressing outfit aha. It has a quilted panel on the front and leopard print on the side panels of the bag. The bag is a really good size for carrying all my junk.. esp college folders and bits of shopping I have to get on the way home. It has a really nice patterned lining on the inside with a zipped compartment and phone holder.I previously had an all leopard shopper from Lipsy that I got over a year ago for my 20th birthday, which I still use. Its just looking a bit tatty now as I have used it so much.  Anyways, I really like it and just wanted to share my thoughts :)

Inside the bag (Taken from my phone, excuse the quality)


Two more of my lipsy bags I have 5 in total :)


Thanks For Reading!
Helen xX

Saturday 19 January 2013

Raspberry Pie


Noooo, not a recipe! A quick wee beauty post. Wouldn't say no to a raspberry pie though! I am still obsessing over the Revlon Lip Butters. I never usually go near bright, darker colours like this one. I usually tend to stick to nudes and light pinks as I don't really like my lips/mouth. I had seen a few blog posts about this colour and thought it would be great for winter and I have been really liking this sort of colour in clothes, it seems to be on trend right now. So, I decided to buy it as I knew from past experience with these lip butters that they are buildable and you can wear it lightly so it just adds a subtle hint of colour, or you can go full wack and use it as a lipstick as there is great pigmentation. Like everyone else,  I love the fact that they are super moisturising, which is essential right now with the horrible cold weather. I'm prone to dry lips so its important right now that my lipsticks don't draw attention to that. Overall, its been a great purchase and I have surprised myself at how often I have been wearing it :) I am struggling with settings on my camera, it is relatively new, so I  apologise for the photo quality  and for how I look.. really run down my Chronic Fatigue doesnt give me a minute :(


      Thanks For Reading!
        Helen xX


*She captures her reflection then she throws the mirror to the floor. Her image is distorted, screaming " Is it worth it anymore.." *

Friday 18 January 2013

Coconut Cookies

I love, love, love the taste of coconut thats why I have incorporated into my fail safe cookie mixture. These cookies are lovely and crunchy on the outside and have a slightly soft centre, with a sweet coconuty taste. Perfect go go along with some afternoon tea or a glass of cold milk. I found this blue china set in my cupboards, not sure where it is from but I adore it :) Want cookies that are ready in eat in less than 25 mins? Read on...


What You Will Need:

50g Caster Sugar
50g Soft Brown Sugar
75g Margarine
150g Self raising Flour
tbsp Golden Syrup
30g Desiccated Coconut
Splash Vanilla Essence
Splash Milk

Method:

Preheat oven to 190 degrees and grease baking trays

Mix together caster sugar, brown sugar and margarine until soft and creamy

Add Syrup and a small drop of vanilla essence. Then add the desiccated coconut and stir in

Sieve flour and add to mixture, and mix using a spoon

The mixture should be a bit dry so add some milk, until you are able to knead it together with your hands

Roll into balls and place on greased tray, do not flatten. They will flatten in the oven

Bake for 10- 15 minutes, They should be slightly soft when they come out of the oven, but will harden as they cool.

TIP * I used a splash of dairy free coconut milk to add a wee bit more flavour. Its fine to use normal milk though :) I discovered this milk last week and its lush. Its low in calories, free from all the nasties and a good source of vitamins. Its great to drink on its own too. The milk is by the brand Kara. You can check it out here. It should be available in most supermarkets *


Happy Baking!
Helen xX

Monday 14 January 2013

Fudge & Chocolate Pieces


What You Will Need :

100g Margarine
100g Soft Brown Sugar
Small Tin Condensed Milk
2tbsp Syrup
225g Digestive Biscuits
150g Cooking Chocolate, Melted
Sprinkles (Optional)

Method:

Melt margarine, sugar, milk and syrup over a low heat for about 5 - 10 mins, stirring continuously

Add crushed digestives, mix and pour into a greased tin

Leave to set for 2 and a half to 3 hours

When fudge set,  melt chocolate in the microwave and smooth over the mix. Add Sprinkles

Leave to set * I forgot about the chocolate and let it set for too long so the chocolate was difficult to cut, resulting in jaggety edges * & slice.


A quick wee post in between essay writing (zzzz). So much work to catch up on, its just too easy to get distracted though...Made these to perk me up, defo enough sugar in these to keep me going :) Would recommend keeping them in the fridge after you slice them, dont taste the same left at room temperature. Base mix should be slightly soft and chewy with some crunch from the biscuits

Happy Baking!
Helen xX

Friday 4 January 2013

Vanilla & Strawberry Celebration Cake

I have to admit this was definitely one of the best tasting cakes I have EVER made. I made this cake for my parents 30th Wedding Anniversary... way back in November, only just getting around to posting this, but its worth the wait and worth a try! Got to mention this was my first time using royal icing. Found it a bit tricky at first but practice makes perfect and I may well start incorporating it more into my cake ideas :)


What You Will Need:

Cake:

200g Butter
200g Caster Sugar
4 Medium Eggs
200g Self Raising Flour
Splash of milk
Vanilla Extract

Filling:

100g Butter
140g Icing Sugar
Vanilla Extract
Mackays Strawberry Jam - No Bits ( I find this jam to have the best sweet flavour)

Decoration:

Regal Ice - Ready To Roll by Dr Oetker (White)
Cherries
Jam (To stick the icing to the cake)


Method:

Preheat oven to 190 degrees and grease 2 cake tins

Cream together butter and sugar to form  a smooth creamy paste. Add vanilla extract.

In a cup beat together the eggs and gradually stir into this mixture.

When mixed, add the sieved flour. Fold together with a metal spoon. This is where I like to add some milk to get it to the consistency I prefer. It should have a light dropping consistency.

Bake in the oven for 20 minutes until light and springy.

* My cake was very light and airy, which made it more delicious. We do not want a heavy cake so do not over beat *

Leave cake to cool thoroughly on a wire rack.

For the icing mix the butter and icing sugar together, until it is completely smooth and creamy. Add a dash of vanilla extract.

Smother this onto one side of the cake sponge and smother lots of jam onto the remaining cake sponge. Be very generous ;) and sandwich both the sponges together

Next you want to either boil or melt the some jam in the microwave until it is a hot liquid. Brush this liquid over the cake

Now for the royal icing, it explains on the package how to use it but basically you take as much as you need ( I used about 3/4) and roll it between your hands until it becomes pliable  Then using a rolling pin roll it out to the thickness you require. Make sure you cover your work surface with lots of icing sugar first (not flour) so that it doesn't stick. When you get your desired thickness, CAREFULLY (!) use your rolling pin and place over the hot jam mix and onto the cake.

Press down carefully and mold to the cake. Cut excess icing off using a sharp knife.

Add cherries using the hot jam to stick them onto the cake


Now enjoy! I seriously loved this cake so much and was really proud of it.
Happy Baking!
Helen xX